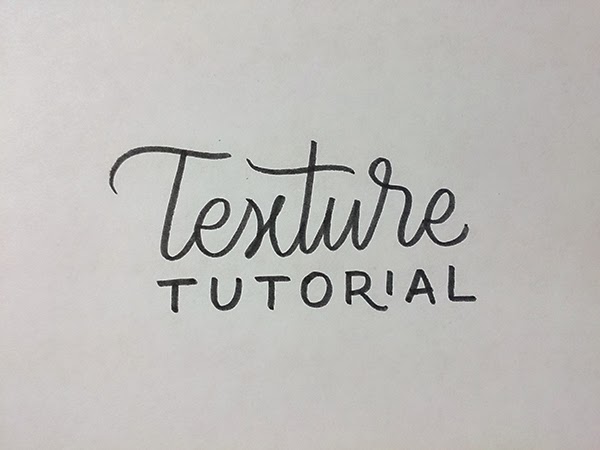
What you'll be making :

I've been exploring hand-lettering further lately. Shot a picture, and give touches on it, colors, and effects on it. So I posted it on my Instagram.


So I'll give you the way to achieve those kind of style. Results may differ through the process.
You can check my previous post for some texture resource. Please note this tutorial is not for absolute beginner on Photoshop, at least you know the interface, tools and menus. The version I'm using is Photoshop CS6 and running on Windows.
Step 1 : Prepare your lettering

After you finished your hand lettering, you can scan or just take an image using camera and edit it on Photoshop. Don't worry if your letters not perfect or imbalance, we will take care of it. The goal of this step is to get the shape of the letters. That's a one quick lettering.
You can take a picture of your letters, or even better scan your work in black and white mode. The picture above is taken using my smartphone Xperia ZR.
Step 2 : Getting Pictures ready on Photoshop
Open your Photoshop, File - New, then set Width: 612px Height: 612px Resolution: 300dpi (or up to you). Then drag your photo or scanned file to the work space, position it on center and press Enter.

On the Layers panel, right-click the active layer - Rasterize Layer.

Step 3 : Black and White
If you're using scanner you still have to do this to make the image better but it's easier since the paper is plain white instead of shades of grey like on the photo.
Go to Image - Adjustments - Levels (Ctrl+L). Now using the black and the white slider, try to make the black just plain black, and whites just plain white. You should experimenting on this.

Step 4 : Selecting
Go to Select - Color Range. And choose highlights as selection option.

Then white area will be active as selection. Press Shift+Ctrl+I (Select - Inverse). And the selection now active on the text.

Now go to Select - Refine Edge (Alt+Ctrl+R). This part is a bit tricky since there is no defined way to make this just right. Lots of experiment I must say.
First, choose View Mode - View - Black and White. Or you can try other options.
Next just move the bars till you get the best result. I usually put it like this :
- Smooth : 2-5px. It will make the object bit smooth on pointed edge.
- Feather : < 5px. You can increase them and the contrast to make the object thicker.
- Contrast : < 40px. Increase them not too high, try too get rid of blurry edge, but don't make it look jagged or rough.
- Shift edge : 5-10 %. Increasing or decreasing the selection.

Step 5 : New Object on New Layer
Make new layer by pressing Create New Layer button on bottom of Layers Panel. Or Shift+Ctrl+N for shortcut. Then click on the Layer 1 (just created) too make sure it's active (blue background panel). And Hide the layer contains previous picture by pressing eye icon on the layer.

Now you got Marching Ants selection with no color on the workspace. Press the Paint Bucket Tool icon on left tools panel (shortcut G) and fill the selection with color Black or White (can easily change later by pressing Ctrl+I while layer active, but I prefer Black first). Now you get a nice clean text object on a new layer with Selection still active for next step.
Step 6 : Applying Texture
With the selection still active. Make new layer Shift+Ctrl+N. Fill this selection on new layer with patterns (check my previous pattern post). So I'm using Pattern Stamp tool with big brush to fill all selection. After fill them, press Ctrl+I to Inverse Color.

Hold Ctrl then click Layer 2 (on the name) and still holding Ctrl click Layer 1, release Ctrl. Both Layer background will be blue means both active. Right click on one of them, Merge Layers.
Then change the Layer blending to Multiply.

Step 7 : Placing Pictures
You can get your free image online on unsplash[dot]com or pexels[dot]com, or maybe using your own. Drag you image file to the workspace. And place the image layer beneath the text.

If you want the text White, press Ctrl+I while layer active (it's gone!), you have to change the Blending Mode to Screen. (Remember! Black - Multiply, White - Screen)
You can add noise pattern. Many free on Internet, buy at creative market, Ian Banard's textures is one of the best and easy to apply. I got some mine HERE. Put it on top layer, Invert (Ctrl+I), then Blending Mode to Screen. Use Ctrl+L to adjust the size of the noise.
Also check out this free noise texture from Medialoot.
And you're done!
There you go. I tried my best, hope you doing well following my tutorial. Sorry if something's not clear or I'm doing it the wrong way. If you have any questions, just leave comment below.
There is an easier way : Put you image, make it black and white, invert (Ctrl+I), blending mode screen, put image, done. But without noise or texture.
It's not the picture that makes the lettering looks good, but practice does. This is just a way of presenting lettering.
If you have followed my tutorial, I really want to see the result, so post it on your Instagram and mention me on the comment @laurensiusadi_ with #texturetutorial.
Share if you find this helpful!
Thanks a lot guys!


.jpg)


No comments:
Post a Comment